

How to set up an online control
This manual describes how to set up online controls using the SPORTident system.
How the Bluebox system works is described on the OResults about page.
Required equipment
Section titled “Required equipment”For each online control you need:
- One Bluebox (see Using Blueboxes) or one Android device with the Bluebox Mobile app
- One or more SI stations equipped with a SRR transmitter (BSF8-SRR or newer)
At an event where every competitor carries a SIAC you can use classic SPORTident stations on the online controls instead of SRR stations: the SIAC sends the punch record itself when the station is set correctly.
Before the event
Section titled “Before the event”Set up the SI stations
Section titled “Set up the SI stations”The SPORTident stations are set up using the SPORTident Config+ software.
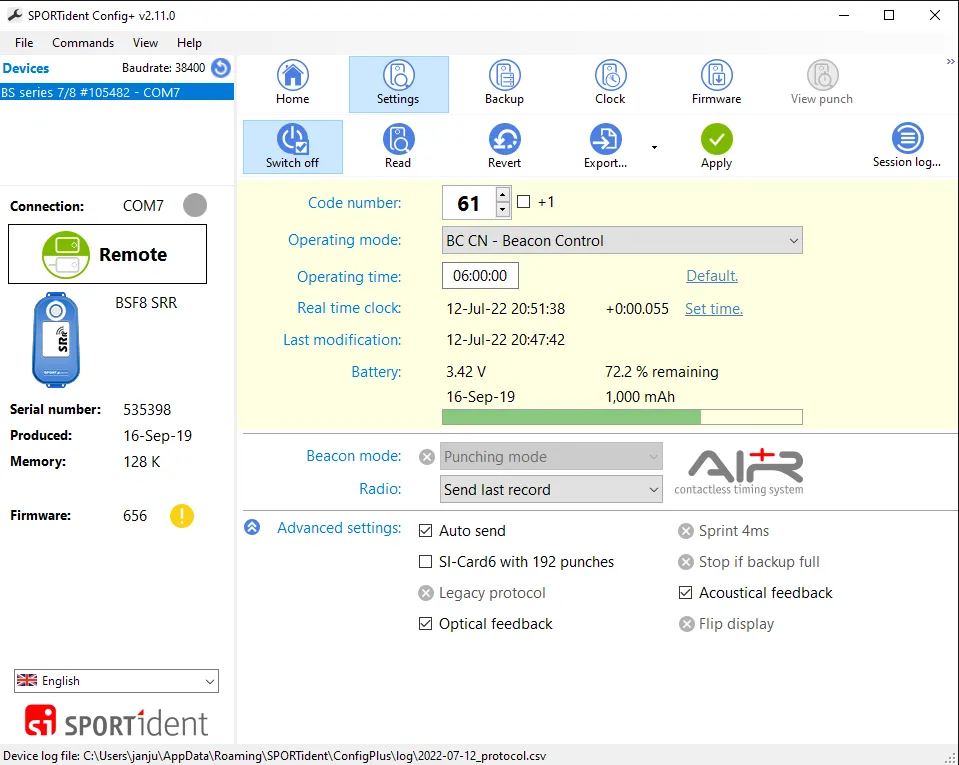
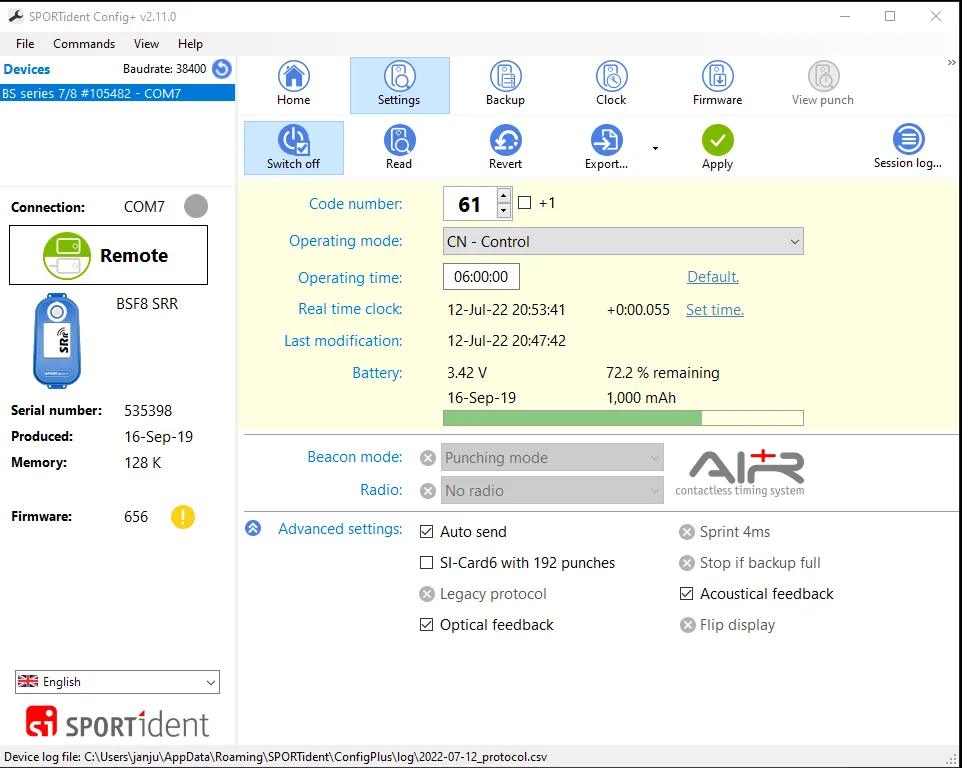
The SI SRR stations must be set up as shown in the following images.
Auto send must be checked — that is what makes the SI SRR station send a contact punch record on to the Bluebox. For contactless punching, additionally set Radio to Send last record, so SIACs send their punch records on as well. Other parameters can be set freely according to the needs of the event.
Select the online controls
Section titled “Select the online controls”The list of controls comes from the courses, so upload them first (see Uploading event files). Until you do, the card reads “Upload courses to select which controls will appear in the results.”
Open the event editor, go to File upload and find Controls in results — the same page the courses were uploaded on. Every control code in your courses appears there with a checkbox, and ticking one marks that control online on every course that visits it. Tick the codes that will carry an SRR station and a Bluebox. A tick takes effect at once; there is no save button.
The finish, with code numbers 1 to 20, is always included, so you never tick it yourself.

Ticked controls become split columns in the live results, so runners appear in the standings before they finish. The course listing on the event editor’s File upload page prints the ticked codes in bold, which is the quickest way to confirm you ticked the ones you meant to.
If the card reads “Fix courses to select online controls.” instead, none of your class names match a course; match them in the Match classes to courses dialog on the File upload page first.
Link the Blueboxes to the event
Section titled “Link the Blueboxes to the event”Punches count towards the event their device is linked to, so link every device before the first start. On the Online controls page, under Link devices to this event, the Available table lists the devices on your account that are not linked to this event and Assigned lists the ones that are. Add links a device, Remove unlinks it.
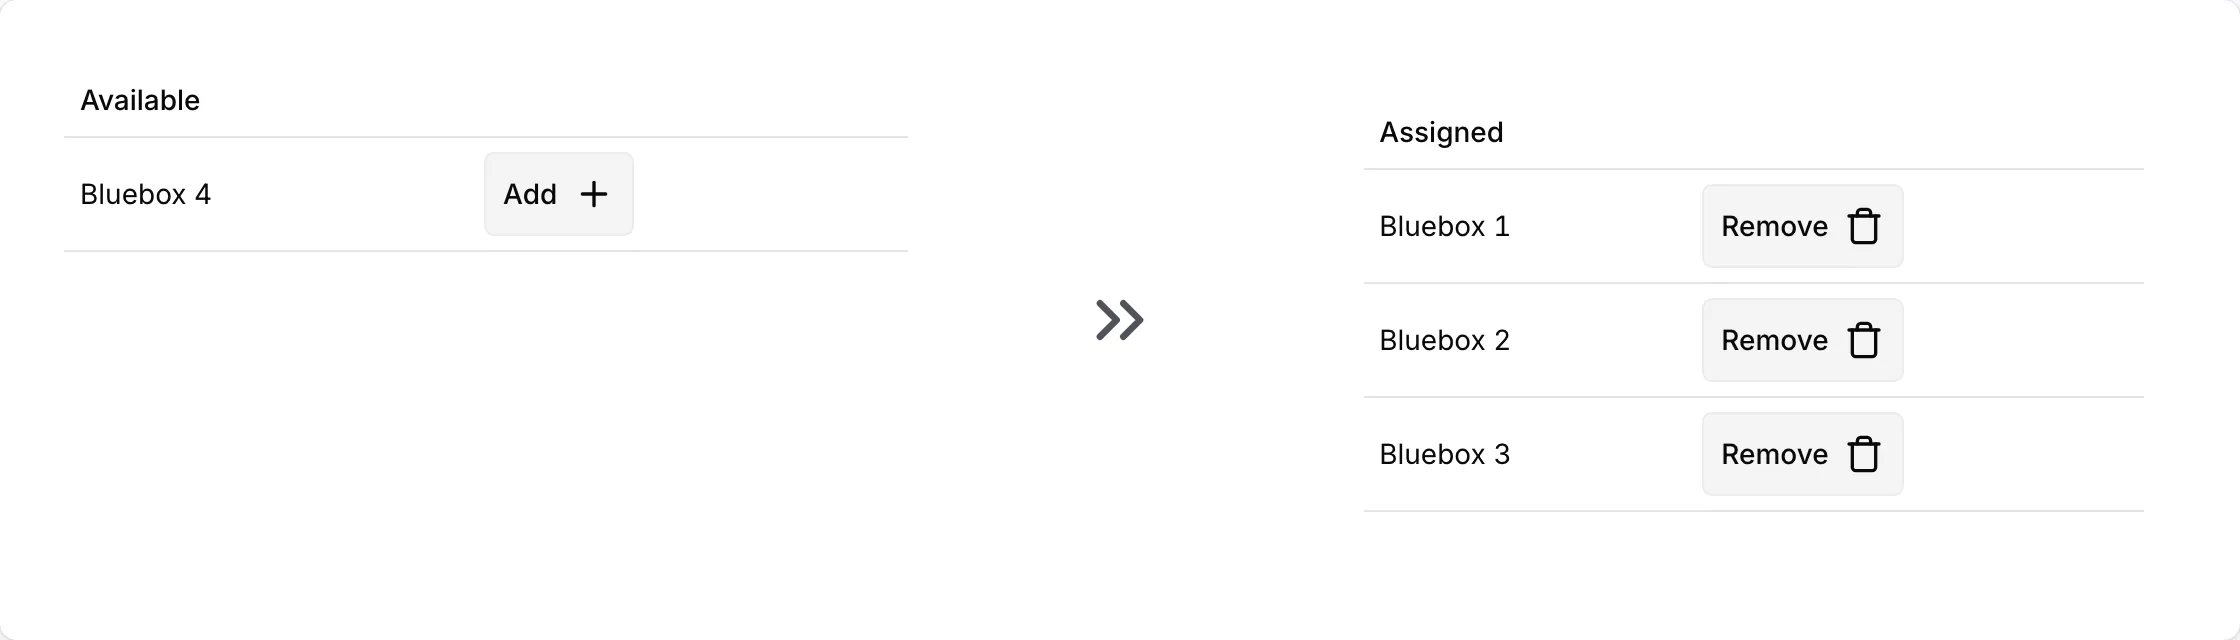
An empty Available table means your account has no devices at all: rent Blueboxes (see How to get online controls) or add your own device under Organize → Devices (see Devices).
On the day of the event
Section titled “On the day of the event”Switch the units on and mount them at the control points — Using Blueboxes covers placement, including the distance a Bluebox can still receive a punch over.
Monitor the devices
Section titled “Monitor the devices”The Status table on the Online controls page refreshes every five seconds and covers the devices linked to this event. Bluebox units carry a Bluebox tag next to their name; Bluebox Mobile devices show the name alone. The remaining columns give signal strength, battery charge, and the code and time of the last punch the device forwarded.
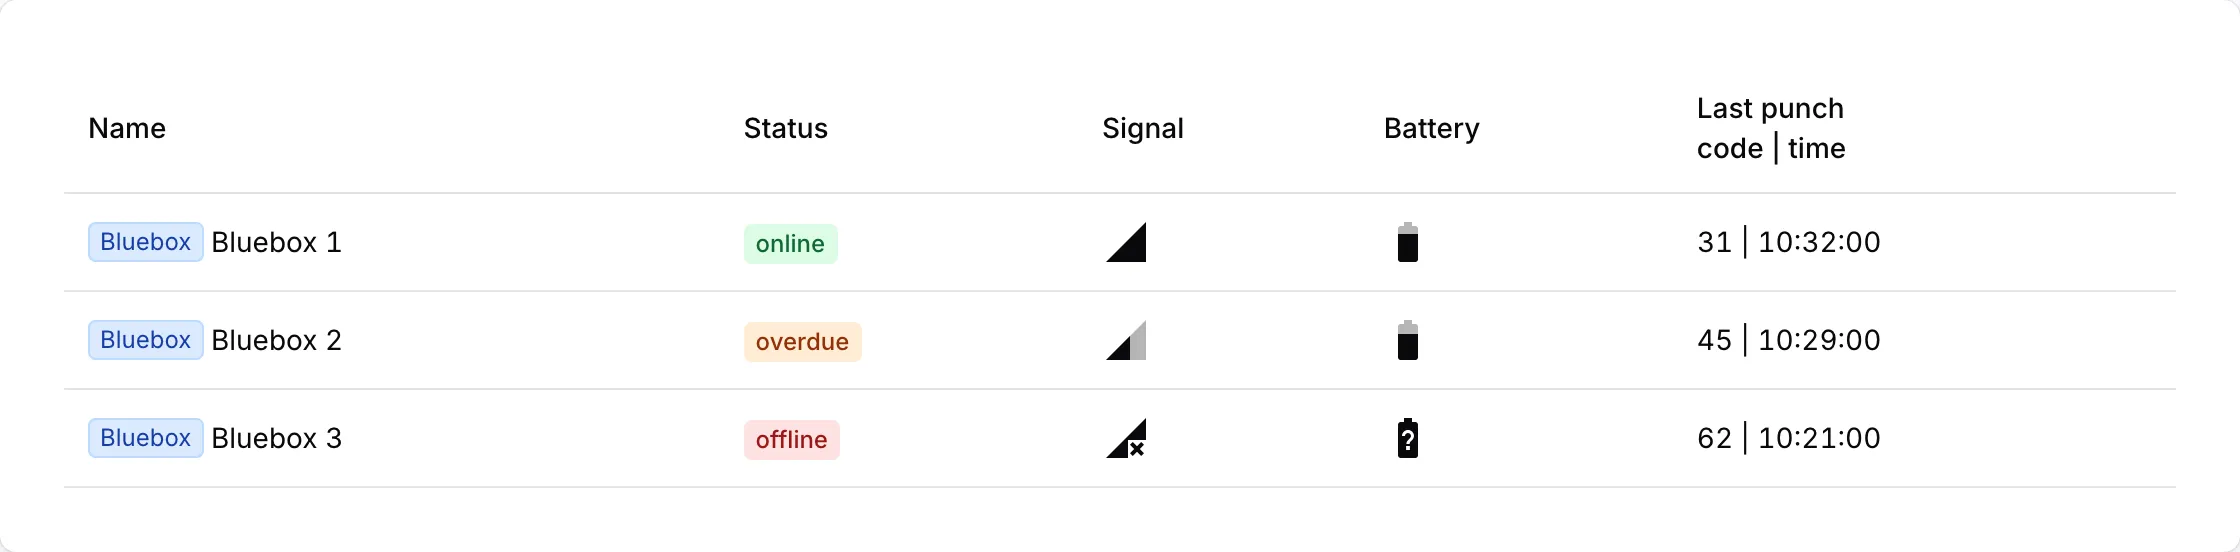
The status column shows:
- online — a status message arrived in the last 45 seconds
- overdue — the last status message is older than that, but the device is still linked and its punches still arrive
- offline — no status message has arrived for 10 minutes
A code and a plausible time in the Last punch column prove more than the status does: they show that the whole chain — SI station, device, network — carried a punch through to OResults.